Published Sep 7, 2023
Data Ingestion: How to Sync Data Between Any Source Application and Snowflake

Integrating data with a data warehouse is crucial for businesses of all sizes. It ensures data quality, enables comprehensive analytics, and streamlines business processes. Recent customer surveys indicate that companies place a high priority on addressing data warehousing and analytics challenges. Our goal is to assist businesses in unlocking and analyzing data stored in data warehouses, preventing data silos. This enhances data quality, improves visibility for reporting, enables operational scalability, and ensures compliance.
Celigo’s template for data warehousing with Snowflake offers a straightforward method to connect your platform and select resources for migration into your data warehouse, facilitating easier data management and analysis.
Data Warehouse Integration Overview
Marketplace
It starts in the marketplace, where you will find the data warehouse template with Snowflake. You can access the template by quickly creating an account. (Then you can browse all all of the other Snowflake integration templates.)

Selecting Data Sources
After installing and configuring a connection to your Snowflake account, you can select between the following ecommerce source applications.

Selecting Resources for Shopify
In this example, we will set up a connection to Shopify and select all the resources available to sync into our data warehouse in Snowflake.

View All Flows
Once the template is installed and all connections are created, they are moved into an integration tile, showing two flows for every connection created. The first flow is to bulk insert resources into a staging table in Snowflake, and the second flow is to merge and delete the staging table.

Creating a Flow Group
Now, to make the integration look more organized, we will create a flow group for each connection, in this case, just one category for Shopify.

Overview of Staging Table Flow
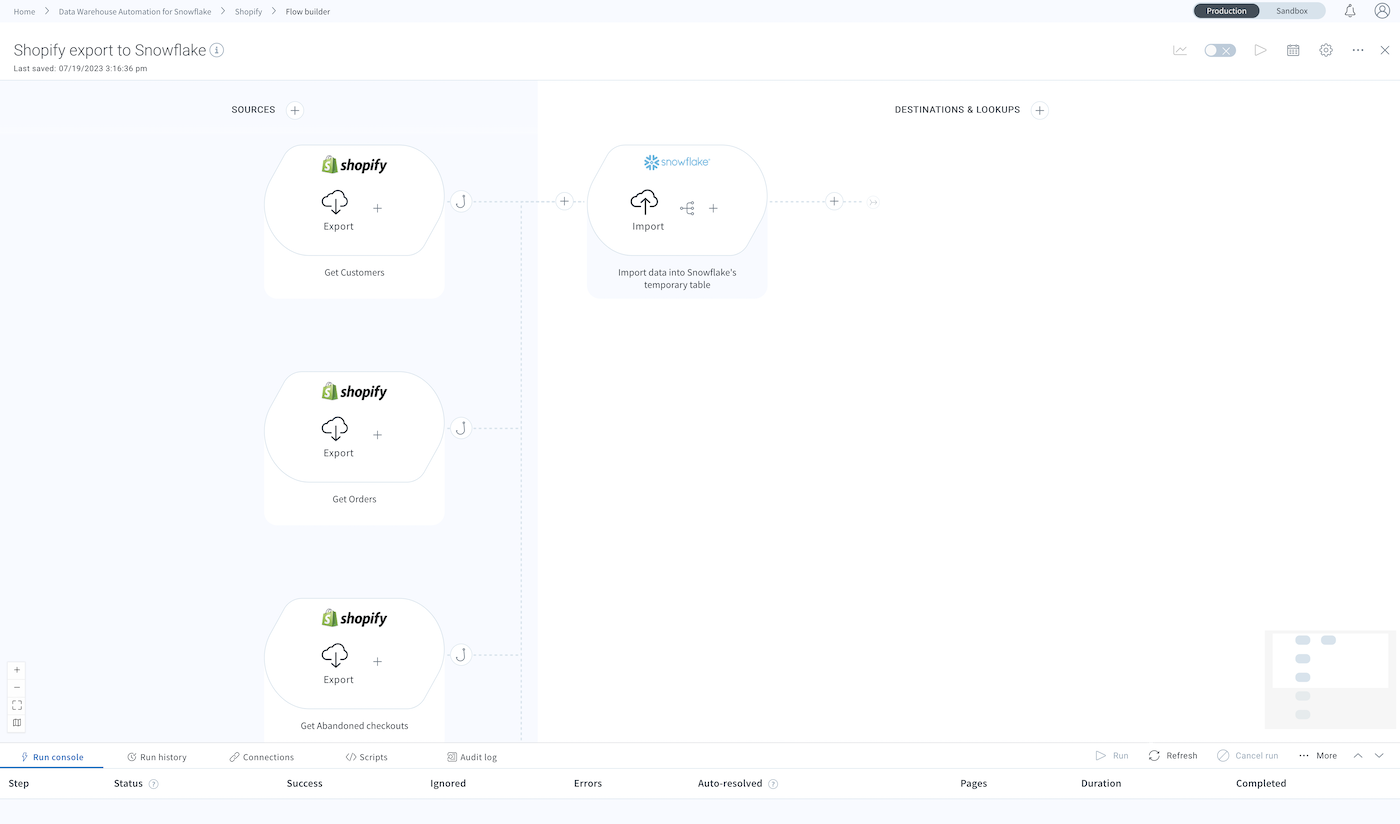
For the first flow in the template, all the selected resources correspond to an individual export step.
In this example, we have three of the five resources shown: Customers, Orders, and Abandoned checkouts.
All of these resources are then synced to a staging table in Snowflake.
Snowflake Import Settings
For the destination table, select the staging table you are using for the Shopify data from the dropdown below.

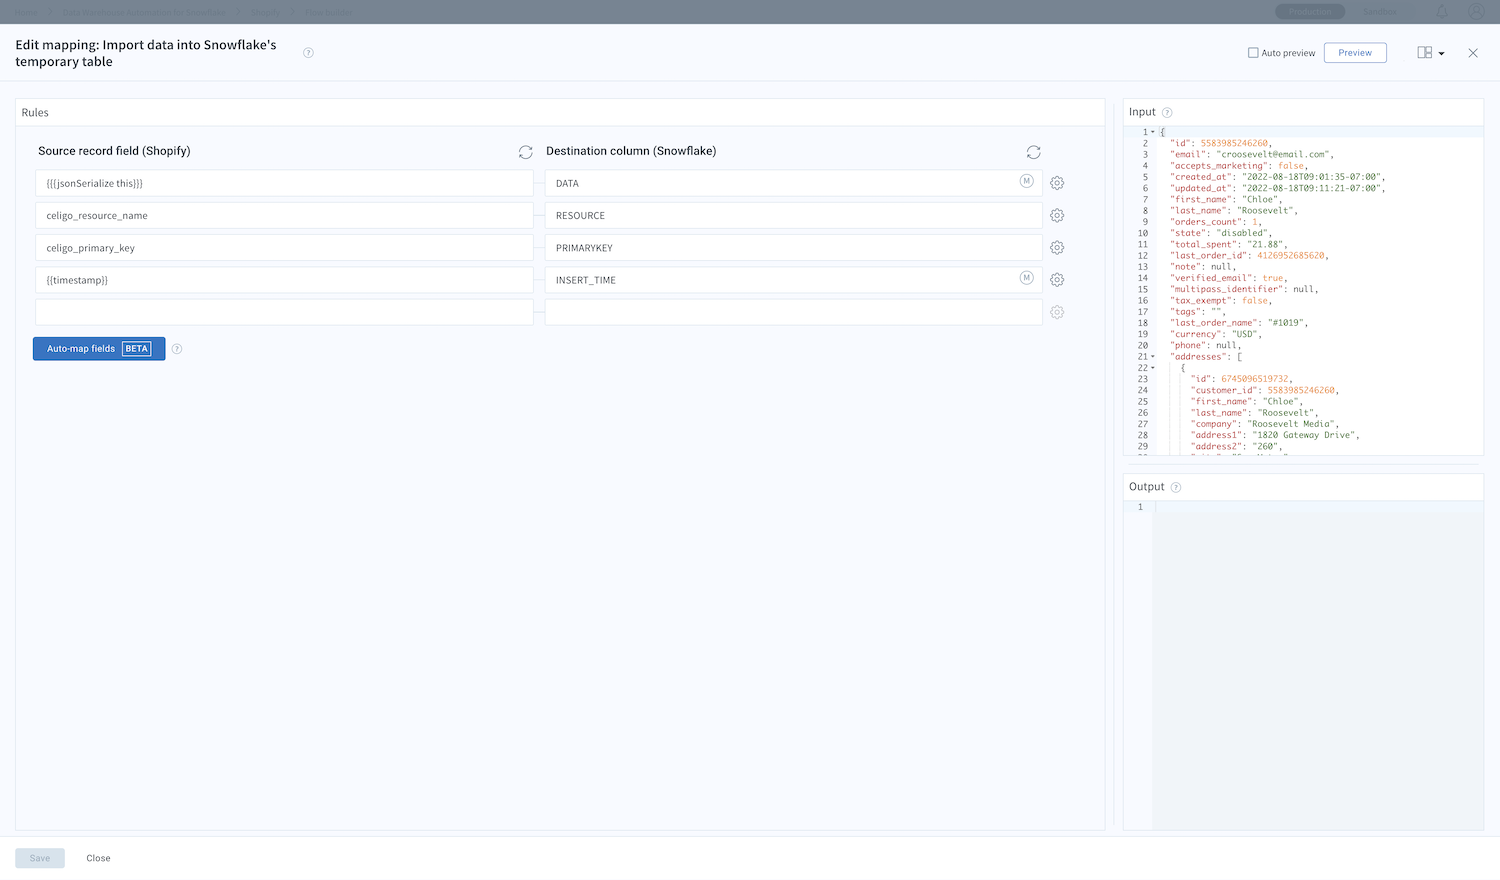
Snowflake Mapping Settings
Our mapping shows that the JSON serialized data will be mapped into a data variant column along with the resource name, which would be Customers, Orders, etc., and the primary key of the data will be mapped into a column, as well as the timestamp of the data.
Overview of Merge & Delete Flow
The second flow, or the merge & delete flow, will check for existing records with a SQL query, limiting to 1, and merge & clear that data from the staging table.

Changing Table Settings
To specify different staging and production tables, changes can made in the flow settings.

Snowflake Data
After all those changes have been made and the flow is set up to use, we can run the flows and view all of the data in our data warehouse in Snowflake.
Data can be queried with different views as needed; however, all the JSON data is shown in the correct table to be viewed, analyzed, and reported on at any time.

Data Is Now In A Warehouse
Congratulations! You have successfully synced your data warehouse and source application.
For more information on this template, read our Data Warehouse Automation for Snowflake documentation, which will address any questions, from an overview to the setup and configuration of other applications.